Wednesday, December 28, 2005

Returning an Id from SQL Server

I found myself in a familiar situation recently:
  • Create an object instance that represents a row in a database.
  • The table must maintain an identity column that the users use to query the table.
  • The instance will be created on the client side, but the id must come from the database.
  • You may not use a GUID, because the customer refuses to use them.
I'm not sure exactly how I came upon this idea, but I thought it was interesting. It's either cool, absolutely horrid, or both.

Assume this table:
CREATE TABLE [dbo].[bars] (
[id] [int] IDENTITY (1, 1) NOT NULL ,
[bar] [varchar] (50) COLLATE SQL_Latin1_General_CP1_CI_AS NOT NULL
) ON [PRIMARY]
This C# can be used to insert and return the identity:
SqlConnection connection = new SqlConnection("initial catalog=foo; data source=blah; uid=me; pwd=right");
SqlCommand command = new SqlCommand("insert into bars values ('some value') select @@identity",connection);
connection.Open();
int identity = int.Parse(command.ExecuteScalar().ToString());
connection.Close();
Drop me a line if you've successfully (or unsuccessfully) done something similar.

Friday, December 16, 2005

Flexibility Cost

One of the toughest challenges in teaching agile development is the YAGNI concept. Traditional development and BDUF teach you "the design is created before coding and testing takes place". In this environment the decision to implement data(base) driven rules must be made early. Unfortunately, this decision is often based on assumptions that turn out to be incorrect.

Currently, I'm working on an application where exactly this has happened. We have a business rule that will vary by state. The analysis done shows that the business rule will be the same for 35 states (thus leaving 15 exceptions). The obvious solution (to us) was to implement a Strategy Pattern.

The only states that currently needed to be implemented were the base case. We put the strategy structure in place in anticipation of the other states so that adding the other states after we were gone would be a very straight forward task for the client developers.

Upon completion, the client architect asked how we handled the task. He was clearly unhappy with our choice. He required that we provide reasons to code the business rule instead of placing it in a database where a business analyst could add new state logic. I'll list our reasons in order of importance.
  1. Testability. Putting the business rule in code allows to easily write tests proving that for each state the proper calculation does occur.
  2. Maintainability. All logic is contained in a small (strategy) class.
  3. Performance. Less trips to the database increases performance.
  4. Process. Currently, the BAs are not restricted to making changes in QA; therefore, they often make changes directly to production database tables. This is clearly a risk.
Not surprisingly, he did not agree, stating:
  1. Testability: "You can test the rule coming back from the database as easily as you can test a rule in code." This is clearly untrue because you aren't testing the logic, but instead testing that the expected result of a database is correct. Since the database can be altered in production the tests become far less valuable.
  2. Maintainability: "An application that allows BAs to simply make changes to a table is far more maintainable than forcing a developer to make the change." Also wrong. The application is more flexible, but less maintainable. Additionally, when the application breaks in production it's going to be harder for the developers to track down the source of the bug.
  3. Process: "The current process does not allow production access." This was also untrue because in an earlier conversation it was stated that they needed to have it in a database to "allow for quick changes in production if a mistake had been made." The point that the code should be tested and the mistake should not make it to production had clearly been lost.
Unfortunately, we were forced into the inferior implementation because of the fear of implementing a new state. Will they ever know they were wrong? No, because the new implementation will allow for the (unnecessary) flexibility and the benefits of the correct implementation will never be noticed. Ignorance is bliss, but it comes at a cost.

Sunday, December 11, 2005

NAnt exec: arg || commandline

NAnt contains an exec task that is used for executing a system command. The exec task is commonly used to execute osql, ruby scripts, simian, etc. Generally, when using exec you will need to pass arguments to the program you are executing. Looking at the documentation for NAnt it appears you have two options: arg or commandline.

Commandline is documented as: The command-line arguments for the program. The syntax is:
<exec program="ruby" commandline="script.rb arg1 arg2 arg3"/>
Using exec and commandline should be the same as executing the following statement at a command line.
$ ruby script.rb arg1 arg2 arg3

Arg is documented as: The command-line arguments for the external program. The syntax is:
<exec program="ruby">
<arg value="script.rb"/>
<arg value="arg1"/>
<arg value="arg2"/>
<arg value="arg3"/>
</exec>
Using exec and arg should be the same as executing the following statement at a command line.
$ ruby "script.rb" "arg1" "arg2" "arg3"

Obviously, the difference is that arg adds quotes around the arguments. This may seem like a small issue, but I've seen time wasted on this minor difference. The most common problematic scenario occurs when someone tries to combine multiple args into one arg tag.
<exec program="ruby">
<arg value="script.rb arg1 arg2 arg3"/>
</exec>
The problem with the above example is that it is the same as executing the following statement at a command line.
$ ruby "script.rb arg1 arg2 arg3"

This won't work in a build and at the command line it would produce:
ruby: No such file or directory -- script.rb arg1 arg2 arg3 (LoadError)

Using commandline or arg is likely a matter of personal preference as long as you are educated on the differences.

Friday, December 09, 2005

Functional Testing using a DSL and NUnit

Selecting a functional test framework very much depends on the aspects of your project. Currently, I'm staffed on a project with the following characteristics.
  • All the development to date has been back-end. (No UI)
  • The functional tests need to be maintained by Business Analysts
  • The application is written in C#
  • The business analysts need to be able to run the tests locally
  • The tests need to run as part of the build
  • The wiki we are using cannot be used as the input for the tests
  • We already had developer maintained functional tests written for NUnit
After identifying these and a few other points we narrowed our choices to NFit or rolling our own. Before we made the decision we spiked the level of effort it would take to roll our own.

Our spike consisted of defining a testing DSL and creating a parser to parse the DSL files and convert them into NUnit tests. The entire process looked like this:
  1. A business analyst creates a test file that contains multiple tests written in our DSL.
  2. The parser parses the DSL into NUnit tests written in C#.
  3. The C# is compiled to a testing DLL.
  4. The NUnit GUI is used to execute the tests contained in the testing DLL.
The DSL was defined based on the existing NUnit tests. For example the NUnit test:
[Test]

public void TestSomething()
{
Transformer transformer = new Transformer();
transformer.LegacyValue = "ASDF";
Assert.AreEqual("42",transformer.ConvertedValue);
}
Could be expressed in our DSL as:
test
legacy_value = "ASDF"
expect "42"
The parser was written in Ruby because we wanted a lightweight solution that allowed for easy string parsing.

The ruby parser was run against a directory and created one large TestFixture class that contained each test specified in the DSL files. This step was added to the build before the compilation step. The the BAFunctionalTest class was compiled into a DLL and NUnit executed the tests in this DLL as part of the build.

Obviously, this DLL could be used with the NUnit GUI to allow the BAs to run their tests locally.

I'm sure we could have done things better, such as creating an internal Ruby DSL instead of an external one. We didn't actively make this decision, and had we chosen this solution I'm sure we would have moved in that direction. It was a fun spike and hopefully I'll actually get to try it out on my next project.

In the end, the decision was made to go with NFit because the team wasn't very familiar with Ruby and they had used Fit frameworks of a different flavor in the past. Looking back, I think that was the biggest mistake we made on the project.

Thursday, December 01, 2005

Simian IgnoreBlocks

Simian contains the feature ignoreBlocks. The documentation on the Simian website states that ignoreBlocks:
Ignores all lines between specified START/END markers
IgnoreBlocks is perfect for ignoring things such as the entire AssemblyInfo class or the Dispose method that is generated for each Form that Visual Studio creates.

To use ignoreBlocks add start and end markers to your code.
#region ignoreBlock - Dispose(bool disposing)
public void Dispose(bool disposing)
{
...
}
#endregion
Then add ignoreBlocks to your Simian configuration file.
-ignoreBlocks=#region ignoreBlock:#endregion
Simian should now be correctly configured to ignore all blocks of code in regions named ignoreBlock.

Documentation for ignoreBlocks is very limited. Here are a few things I learned along the way.
  • In version 2.2.7 and below ignoreBlocks does not work correctly with #regions in C#.
  • Simian ignores all comment lines; therefore, comments can not be used as start and or end markers.
  • If you use a configuration file do not add quotes around the start and end markers.
  • If you specify your options at the command line put quotes around the start and end markers. (i.e. -ignoreBlocks="#region ignoreBlock:#endregion")
  • Simon Harris is very responsive and kind. If you have any questions about Simian do not hesitate to contact him.

Improving Brittle Functional Tests

Functional tests often rely on an external resource existing in a well known state. A test could simply validate that a class returns valid data from the database. For end-to-end testing these tests are very valuable. Unfortunately, these end-to-end tests are also brittle if done incorrectly. Brittle tests often lead to builds breaking unexpectedly. These are the worst types of broken builds. The developer who checked in knows that their change did not cause the build to break. Because their change was not the cause of the broken build they feel unmotivated to fix the build. Of course, they have to fix the build, but are unhappy with the level of effort needed to track down the cause of the error. This pain is not quickly forgotten and often leads to one or both of two outcomes.

  • Broken builds become common and are ignored. As long as the build occasionally passes everyone writes off the broken builds as a data problem. Much of the value of the build box is lost at this point.
  • Developers check in less. Often a pair will work an entire day without checking in any changes. The pair understands that fixing the build will be a painful and time-consuming process and for efficiency they choose to endure this task only once a day. This leads to a larger number of code conflicts and general integration issues. Productivity will be lost.
Fortunately, there are alternatives to assuming a resource is in a well known state.

Create a database that is only used during the build. Ensure this database is in a well known state by dropping objects, adding objects, and loading data with each build. If you are using SQL Server, osql can be used to execute SQL scripts that perform these tasks.

If the database is a shared resource you may not have the ability to drop, add, and delete any time you like. In this scenario, everyone requiring access must agree on a time where the data can be reset to a well known state. The reset can be performed by an additional build that is created to reset the database and immediately run all functional tests that depend on the well known state. This option is less favorable because it requires that the tests be run on a timed interval instead of after each change. However, this negative can be mitigated by creating an In Memory Database that mimics the behavior of the real database. The test suite that runs following each change can include tests that act as end-to-end tests but use the In Memory Database.

Durable functional tests are absolutely necessary in a well running agile environment.

Monday, November 28, 2005

Unit Test Guidelines

Tests live under many names. And, many tests masquerade as unit tests.

Unit testing is defined as:
... a procedure used to verify that a particular module of source code is working properly. The idea about unit tests is to write test cases for all functions and methods so that whenever a change causes a regression, it can be quickly identified and fixed. Ideally, each test case is separate from the others ... [Wikipedia]

There are existing practices that I consider to be good guidelines concerning unit testing.

  • William Caputo - Do Not Cross Boundaries. The central idea is to decouple the code from the resources. An added benefit is the reduced running time of the tests. The faster the tests are, the more often they are run.
  • Dave Astels - One Assertion Per Test. While the idea is controversial it's also very thought provoking. If you follow this rule your tests become simple, expressive, and elegant. I don't follow this rule 100% of the time; however, I do believe it's a great guideline.

I follow another guideline that I haven't seen documented anywhere.
Only one concrete class (with behavior) should be used per test.
The central reason for testing concrete classes individually is to promote durable tests. When several concrete classes are used in one test the test becomes brittle. Making a change to any of the coupled concrete classes can cause cascading test failures.

Both mocks and stubs can be used in place of concrete classes where necessary while testing an individual class. If you find your hierarchy too complicated to use mocks or stubs this is probably a sign that you need a simpler and less coupled hierarchy. Using Object Mother is a common alternative to refactoring to a better hierarchy. If you find yourself reaching for Object Mother, take the time to refactor instead.

Sunday, November 27, 2005

What's in your build?

A basic build generally consists of clean, compile, and test. However, you can (and should) add more or tweak the build to make life easier and increase the quality of the code you produce. Most people _hate_ working on the build. Build languages are usually painful to work with and optimizing the build isn't very exciting. However, you should be running the build several times a day so each optimization can save you a lot of time over the life of the project.

  • Separate Tests - Create unit tests that test specific responsibilities of individual classes. Create functional tests that test classes working together to achieve a larger goal.
  • Database Generation - Use database scripts to generate the database during the build. Optimize the process by only dropping and adding tables, views, etc when the script(s) change. However, clear and reload the sample data on each build to ensure functional tests are hitting consistent data each build.
  • Simian - Use Simian to ensure that duplicate code is not slipping into your code base.
  • Code Coverage - I admit it, Code Coverage can be misleading. However, managers and business sponsors love charts with reassuring numbers. Additionally, if the team pays little attention to the code coverage number an interesting thing happens. No one attempts to trick the code coverage numbers and they become useful. When the numbers dip below tolerance the tech lead can use the warning to suggest to the team that more focus be given to testing. Note: The tech lead should never mention that the code coverage tool tipped him off or the team may start writing worthless tests that satisfy the code coverage tool, thus rendering it useless.
    For .net use NCover (the version that fits your needs) or Clover.net, for Java I believe Clover is the most popular
  • Modification Compilation - Use a build language that can detect modification dates. Components of your application only need to be recompiled when changes are made to the source files.

There are other tools such as CheckStyle and FXCop that are supposed to be helpful. In theory they sound great; however, I've never used either so I didn't include either. Please let me know if you have any suggestions or optimizations I've missed.

Friday, November 18, 2005

Adding NanoContainer

After you have already decided to Add PicoContainer you can go a step further and use NanoContainer. NanoContainer is a complement to the PicoContainer project, providing it with additional functionality. One aspect of NanoContainer is the ability to mark your classes with an attribute that PicoContainer can use to register components.

Using NanoContainer attributes is very easy. Each of my classes need to be registered with default options (Constructor Injection, Caching); therefore, all I need to do is add the [RegisterWithContainer] attribute to each class. I add this attribute to all the classes I want registered; however, I'll only show PresenterFactory.
[RegisterWithContainer]
public class PresenterFactory
{
public Hashtable presenterHash = new Hashtable();

public PresenterFactory(IPresenter[] presenters)
{
for (int i = 0; i < presenters.Length; i++)
{
this.presenterHash[presenters[i].View.GetType()] = presenters[i];
}
}

public IView Find(Type type)
{
IPresenter presenter = (IPresenter) presenterHash[type];
presenter.Push();
return presenter.View;
}
}

After adding the [RegisterWithComponent] attribute I change the EntryPoint class implementation to use the AttributeBasedContainerBuilderFacade. The BuilderFacade will create a new instance of IMutablePicoContainer that I can use to register my UserData instance. I can also continue to use the container to get an instance of the MainPresenter.
public class EntryPoint
{
[STAThread]
static void Main()
{
ContainerBuilderFacade containerBuilderFacade = new AttributeBasedContainerBuilderFacade();
IMutablePicoContainer container = containerBuilderFacade.Build(new string[] {"SampleSmartClient.UI.dll"});
container.RegisterComponentInstance(createUser());
MainPresenter presenter = (MainPresenter) container.GetComponentInstance(typeof(MainPresenter));
Application.Run(presenter.MainForm);
}

private static UserData createUser()
{
UserData user = new UserData();
user.Name = "John Doe";
user.JobTitle = "Rockstar";
user.PhoneNumber = "212-555-1212";
user.Password = "password";
return user;
}
}


As I previously noted, using NanoContainer Attributes does add a dependency to NanoContainer. Some people are very against this idea. Personally, it seems like another case of concern over less dependency for less dependencies sake. Adding a dependency to NanoContainer should cause you no pain, but it will clean up your code. The achieved clarity in code is worth the added dependency.

Adding PicoContainer

I recently blogged about Rich Client Development in a 4 part series that led to a small reference implementation. It is immature, but it's in perfect condition to demonstrate the value of PicoContainer.

The current implementation of the EntryPoint class looks like this:
public class EntryPoint
{
[STAThread]
static void Main()
{
MainForm mainForm = new MainForm();
UserData userData = createUser();
new MainPresenter(mainForm, createPresenterFactory(userData));
Application.Run(mainForm);
}

private static UserData createUser()
{
UserData user = new UserData();
user.Name = "John Doe";
user.JobTitle = "Rockstar";
user.PhoneNumber = "212-555-1212";
user.Password = "password";
return user;
}

private static PresenterFactory createPresenterFactory(UserData user)
{
return new PresenterFactory(getPresenters(user));
}

private static IPresenter[] getPresenters(UserData user)
{
return new IPresenter[] { getReadPresenter(user), getUpdatePresenter(user) };
}

private static IPresenter getReadPresenter(UserData user)
{
ReadView view = new ReadView();
return new ReadPresenter(view, user);
}

private static IPresenter getUpdatePresenter(UserData user)
{
UpdateView view = new UpdateView();
return new UpdatePresenter(view, user);
}
}

While this is clean, it's a bit more verbose than necessary. A simpler solution is to register each type with PicoContainer and allow Pico to resolve the dependencies. The only exception is that I would like to populate a UserData instance that will be used as a constructor argument to many other classes. Pico allows me to do this using RegisterComponentInstance. Converting my EntryPoint class to take advantage of PicoContainer causes the implementation to look like this:
public class EntryPoint
{
[STAThread]
static void Main()
{
DefaultPicoContainer container = new DefaultPicoContainer();
container.RegisterComponentInstance(createUser());
container.RegisterComponentImplementation(typeof(PresenterFactory));
container.RegisterComponentImplementation(typeof(MainPresenter));
container.RegisterComponentImplementation(typeof(MainForm));
container.RegisterComponentImplementation(typeof(ReadPresenter));
container.RegisterComponentImplementation(typeof(ReadView));
container.RegisterComponentImplementation(typeof(UpdatePresenter));
container.RegisterComponentImplementation(typeof(UpdateView));
MainPresenter presenter = (MainPresenter) container.GetComponentInstance(typeof(MainPresenter));
Application.Run(presenter.MainForm);
}

private static UserData createUser()
{
UserData user = new UserData();
user.Name = "John Doe";
user.JobTitle = "Rockstar";
user.PhoneNumber = "212-555-1212";
user.Password = "password";
return user;
}
}

This implementation is shorter and arguably easier to understand. Notice PicoContainer creates instance of the dependent objects I need including an array of IPresenters that are used as a constructor argument to the PresenterFactory. If you design your class as Good Citizens and prefer Constructor Injection, adding PicoContainer should be easy and very worthwhile.

MVP and Dialog

I recently received a request to show how Model View Presenter and a modal dialog could work together. I'm going to use the existing rich* client example I've been working with lately. For demonstration purposes we will assume that the UserData class has a password property that contains a user's password. When a user updates their information they will be prompted to enter their password. Successful authentication updates their information and navigates the user to the read only view. Unsuccessful authentication does nothing, but clicking "Cancel" will close the dialog without saving info and without navigating away from the update view.

The modification is to add a password to the existing UserData instance.
public class EntryPoint
{
private static UserData createUser()
{
UserData user = new UserData();
user.Name = "John Doe";
user.JobTitle = "Rockstar";
user.PhoneNumber = "212-555-1212";
user.Password = "password";
return user;
}

...
}

The only change to the UpdateView is to remove the NavigationDispatcher.RaiseNavigate method call from the saveButton click handler. We'll now handle navigation in the presenter (perhaps we should have moved it when we introduced the NavigationDispatcher anyway).

The SaveUserDialog is a Windows Form that allows a user to enter a password and save, or cancel and do not save.

SaveUserDialog exposes it's PasswordTextBox as a public field. When a user clicks the "Save" button SaveUserDialog raises the RequestAuthorization event. Clicking "Cancel" just closes the form.
public class SaveUserDialog : Form
{
private Label label1;
public TextBox PasswordTextBox;
private Button saveButton;
private Button cancelButton;
public event UserAction RequestAuthorization;
private Container components = null;

public SaveUserDialog()
{
InitializeComponent();
}

... deleted generated code...

private void saveButton_Click(object sender, EventArgs e)
{
RequestAuthorization();
}

private void cancelButton_Click(object sender, System.EventArgs e)
{
this.Close();
}
}

The presenter for the SaveUserDialog has the responsibility of verifying the password matches and then setting the dialog.DialogResult = DialogResult.Yes.
public class SaveUserPresenter
{
private readonly SaveUserDialog dialog;
private readonly string password;

public SaveUserPresenter(SaveUserDialog dialog, string password)
{
this.dialog = dialog;
this.password = password;
dialog.RequestAuthorization+=new UserAction(AuthorizeSave);
}

private void AuthorizeSave()
{
if (dialog.PasswordTextBox.Text==password)
{
dialog.DialogResult=DialogResult.Yes;
dialog.Close();
}
}
}

I considered passing the entire UserData object to the SaveUserPresenter; however, it seemed easier to keep this presenter as thin as possible and keep the save functionality in the UpdatePresenter. If more functionality were required I wouldn't hesitate to pass in more objects and give more responsibility to the SaveUserPresenter.

All of these changes and additions come together in the UpdatePresenter. The UpdatePresenter is now responsible for creating and showing the SaveUserDialog. Additionally, the UserData instance should only be updated if the SaveUserDialog returns DialogResult.Yes. Lastly, the UpdatePresenter is also responsible for calling NavigationDispatcher.RaiseNavigate if DialogResult.Yes is set.
public class UpdatePresenter : IPresenter
{
private readonly UpdateView view;
private readonly UserData user;

public UpdatePresenter(UpdateView view, UserData user)
{
this.view = view;
this.user = user;
view.Save+=new UserAction(updateUser);
Push();
}

public IView View
{
get { return view; }
}

public void Push()
{
view.NameTextBox.Text = user.Name;
view.JobTextBox.Text = user.JobTitle;
view.PhoneTextBox.Text = user.PhoneNumber;
}

private void updateUser()
{
SaveUserDialog dialog = new SaveUserDialog();
new SaveUserPresenter(dialog, user.Password);
if (dialog.ShowDialog()==DialogResult.Yes)
{
user.Name = view.NameTextBox.Text;
user.JobTitle = view.JobTextBox.Text;
user.PhoneNumber = view.PhoneTextBox.Text;
NavigationDispatcher.RaiseNavigate(typeof(ReadView));
}
}
}

If my application contained several modal dialogs I would also look at possibly moving the creation into a factory similar to the PresenterFactory. Each presenter could take the DialogFactory as a constructor argument allowing for easy access.

For testing purposes I would create a IDialog interface that contained the DialogResult property. Each Dialog would obviously implement the IDialog interface and the dialog presenters would take an IDialog as a constructor argument instead of the concrete class. This would allow me to easily mock the dialog when testing the SaveUserPresenter.

* thanks to Matt Deiters for pointing out that, contrary to popular belief, smart and rich are different. (luckily, Matt is both)

Wednesday, November 16, 2005

Smart Client Development Part IV

In Part III I completed the UpdatePresenter and had a working demo application. Unfortunately, you may have noticed that in MainPresenter the Navigate of each view is subscribed to each time it is returned from the PresenterFactory. This causes the MainPresenter to reload the View as many times as it has been returned from the PresenterFactory. To solve this issue you can add another class called NavigationDispatcher.
public class NavigationDispatcher
{
public static void RaiseNavigate(Type type)
{
Navigate(type);
}

public static event NavigateHandler Navigate;
}

NavigationDispatcher allows you to raise the Navigate event from both the MainForm and the UpdateView. The UpdateView button click event changes to:
private void saveButton_Click(object sender, EventArgs e)
{
Save();
NavigationDispatcher.RaiseNavigate(typeof(ReadView));
}

The only other change to make is in MainPresenter.
public class MainPresenter
{
private readonly MainForm form;
private PresenterFactory presenterFactory;

public MainPresenter(MainForm form, PresenterFactory presenterFactory)
{
this.form = form;
NavigationDispatcher.Navigate+=new NavigateHandler(Navigate);
this.presenterFactory = presenterFactory;
}

private void Navigate(System.Type viewType)
{
form.ContentPanel.Controls.Clear();
IView view = presenterFactory.Find(viewType);
form.ContentPanel.Controls.Add((Control) view);
}
}

Subscription to the NavigationDispatcher's Navigate event occurs in the constructor; however, the subscription is no longer necessary in the Navigate event (where we used to subscribe to the Navigate event of the View). Obviously, the Navigate event can be removed from the IView at this point also.

Smart Client Development Part III

In Part II I added presenter functionality to the ReadView User Control. Next I'll add a Presenter for the UpdateView

Adding the UpdatePresenter actually led to a decent refactoring. After adding UpdatePresenter I realized that I needed the ability to push changes in the UserData instance to the ReadView.

This meant changing the ViewFactory to a PresenterFactory. This change was required because the Presenter handles pushing changes to the view. Therefore, I needed to maintain a reference to the presenter and call Push before displaying a view. The refactored ViewFactory becomes this PresenterFactory.
public class PresenterFactory
{
public Hashtable presenterHash = new Hashtable();

public PresenterFactory(IPresenter[] presenters)
{
for (int i = 0; i < presenters.Length; i++)
{
this.presenterHash[presenters[i].View.GetType()] = presenters[i];
}
}

public IView Find(Type type)
{
IPresenter presenter = (IPresenter) presenterHash[type];
presenter.Push();
return presenter.View;
}
}

This lead to changing the EntryPoint to add IPresenters to the PresenterFactory.
public class EntryPoint
{
[STAThread]
static void Main()
{
MainForm mainForm = new MainForm();
UserData userData = createUser();
new MainPresenter(mainForm, createPresenterFactory(userData));
Application.Run(mainForm);
}

private static UserData createUser()
{
UserData user = new UserData();
user.Name = "John Doe";
user.JobTitle = "Rockstar";
user.PhoneNumber = "212-555-1212";
return user;
}

private static PresenterFactory createPresenterFactory(UserData user)
{
return new PresenterFactory(getPresenters(user));
}

private static IPresenter[] getPresenters(UserData user)
{
return new IPresenter[] { getReadPresenter(user), getUpdatePresenter(user) };
}

private static IPresenter getReadPresenter(UserData user)
{
ReadView view = new ReadView();
return new ReadPresenter(view, user);
}

private static IPresenter getUpdatePresenter(UserData user)
{
UpdateView view = new UpdateView();
return new UpdatePresenter(view, user);
}
}

The IPresenter interface is used to get access to the View and to Push the model changes to the View before it is displayed.
public interface IPresenter
{
IView View { get; }
void Push();
}

After these changes you can add the UpdatePresenter.
public class UpdatePresenter : IPresenter
{
...

private void saveButton_Click(object sender, System.EventArgs e)
{
Save();
Navigate(typeof(ReadView));
}
}

The end result is an update view that saves changes....

when you click "Save."

Smart Client Development Part II

In Part I I described the basic set up for creating a smart client application. The next step is to add some data to the UserData object created in the EntryPoint and then display this data in the ReadView User Control.

EntryPoint should be updated by adding some values to UserData and passing the user object to ReadView's presenter.
public class EntryPoint
{
[STAThread]
static void Main()
{
MainForm mainForm = new MainForm();
UserData userData = createUser();
new MainPresenter(mainForm, userData, createViewFactory(userData));
Application.Run(mainForm);
}

private static UserData createUser()
{
UserData user = new UserData();
user.Name = "John Doe";
user.JobTitle = "Rockstar";
user.PhoneNumber = "212-555-1212";
return user;
}

private static ViewFactory createViewFactory(UserData user)
{
return new ViewFactory(getViews(user));
}

private static UserControl[] getViews(UserData user)
{
return new UserControl[] { getReadView(user), getUpdateView(user) };
}

private static UserControl getReadView(UserData user)
{
ReadView view = new ReadView();
new ReadPresenter(view, user);
return view;
}

private static UserControl getUpdateView(UserData user)
{
return new UpdateView();
}
}

ReadView's presenter handles the logic that puts the correct data in the ReadView.
public class ReadPresenter
{
private readonly ReadView view;
private readonly UserData user;

public ReadPresenter(ReadView view, UserData user)
{
this.view = view;
this.user = user;
push();
}

private void push()
{
view.NameLabel.Text = user.Name;
view.JobLabel.Text = user.JobTitle;
view.PhoneLabel.Text = user.PhoneNumber;
}
}

The only other changes that need to be made are making the NameLabel, JobLabel, and PhoneLabel public on the view.
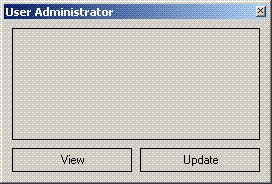
The result is a dumb view and all the behavior is in the Presenter. The view should look similar to this and be working at this point if you click on "View."


In Part III I'll create the presenter for the UpdateView.

Smart Client Development Part I

A friend recently requested that I document how I've recently been doing smart client development. I decided to put together a small application to show the basics.

The first step to creating a smart client application is setting up the solution. The UI will need to be separated into a Class Library project and a Windows Applicaiton project. The Windows Application project will usually contain only the entry point to the application. All other UI components will live in the Class Library.

Testability is the reason we separate the UI components into their own library. It's possible to be tricky and combine the projects; however, separating this way is easy and allows us to test the UI components without any additional steps.


The EntryPoint class has the responsibility of creating an instance of the MainPresenter and the MainForm. (I'm also going to pass in a UserData instance and a ViewFactory instance to the MainPresenter's constructor. Perhaps in the future I'll document how I'd likely handle this using PicoContainer for a real system.)
public class EntryPoint
{
[STAThread]
static void Main()
{
MainForm mainForm = new MainForm();
UserData userData = new UserData();
new MainPresenter(mainForm, userData, createViewFactory());
Application.Run(mainForm);
}

private static ViewFactory createViewFactory()
{
return new ViewFactory(getViews());
}

private static UserControl[] getViews()
{
return new UserControl[] { getReadView(), getUpdateView() };
}

private static UserControl getReadView()
{
return new ReadView();
}

private static UserControl getUpdateView()
{
return new UpdateView();
}
}
The MainForm contains a button for viewing user details, a button for
editing user details, and a panel where the user controls will be added
in response to user actions.

Next we'll add the views and handle navigating between them. For now I'll use view place holders that have a label that says "Read" or "Update" depending on which view is being displayed. The ReadView also navigates to the UpdateView when the label is clicked. This allows us to verify that the navigation is wired and working. The User Controls are normal User Controls that implement the IView interface allowing them to be used for navigation.
public class ReadView : UserControl, IView
{
private Label label1;
private Container components = null;
public event NavigateHandler Navigate;

public ReadView()
{
InitializeComponent();
}

protected override void Dispose( bool disposing )
{
if( disposing )
{
if(components != null)
{
components.Dispose();
}
}
base.Dispose( disposing );
}

... snipped generated code ...

private void label1_Click(object sender, System.EventArgs e)
{
Navigate(typeof(UpdateView));
}
}


The IView interface only contains the Navigate event used for specifying which User Control to navigate to.
public interface IView
{
event NavigateHandler Navigate;
}

The NavigationHandler specifies a parameter of Type allowing you to specify which view to navigate to.
public delegate void NavigateHandler(Type viewType);

The ViewFactory holds each View in a Hashtable and returns them based on the type requested.
public class ViewFactory
{
public Hashtable viewHash = new Hashtable();

public ViewFactory(UserControl[] views)
{
for (int i = 0; i < views.Length; i++)
{
this.viewHash[views[i].GetType()] = views[i];
}
}

public IView Find(Type type)
{
return (IView) viewHash[type];
}
}

The MainForm also implements IView. Implementing IView allows MainForm to raise Navigation events. The user triggers this navigate by clicking one of the buttons. The button click event then raises Navigate with the appropriate view specified.
public class MainForm
{
...

private void viewButton_Click(object sender, EventArgs e)
{
Navigate(typeof(ReadView));
}
}

The MainFormPresenter ties everything together by subscribing to the Navigate events of both the MainForm and each View. When the Navigate event is raised the Presenter requests a view from the ViewFactory.
public class MainPresenter
{
private readonly MainForm form;
private readonly UserData user;
private ViewFactory viewFactory;

public MainPresenter(MainForm form, UserData user, ViewFactory viewFactory)
{
this.form = form;
form.Navigate+=new NavigateHandler(Navigate);
this.user = user;
this.viewFactory = viewFactory;
}

private void Navigate(System.Type viewType)
{
form.ContentPanel.Controls.Clear();
IView view = viewFactory.Find(viewType);
view.Navigate+=new NavigateHandler(Navigate);
form.ContentPanel.Controls.Add((Control) view);
}
}

This example is simple, but will be the basis for showing how to implement a easily testable and well separated UI layer.

Tuesday, November 15, 2005

C# Public Readonly Fields

C# public readonly fields are great. Why waste your time writing this:
public string foo;
public string Foo
{
get { return foo; }
}
When this:
public readonly string Foo;
gives you the same level of protection?

I know people simply hate public fields. The problem is this hatred has become blind hatred. A public field is dismissed without thought. In reality a private field and a getter gains me little over a public readonly field. You could argue that making a field readonly ensures it contains the value expected and is better than simply a private field with a getter.

Because I actively seek Good Citizens and Constructor Injection the field being writable only in a constructor or on the same line as the declaration is rarely a problem.

I prefer less code over blindly following a rule that simply doesn't apply to readonly fields.

Tuesday, November 08, 2005

Logging == Crutch

When developing using BDUF log files are often used to determine expected input and output. The log file is a valuable tool that can be used to determine the source of bugs and problems.

However, once you step into the world of Test Driven Development you should leave the log file in the past. Instead of depending on a log file, the test suite should test for boundry cases that would appear in a log file.

BDUF is walking (or crawling), but Agile development is running. When you want to run, leave the crutch behind.

Saturday, November 05, 2005

Attribute usage

Attributes in .net are controversial. NUnit's attribute usage has been praised. Conversely, the NanoContainer implementation has been criticized*. So what is the difference? What makes one usage successful and another a failure?

In an email exchange, Martin Fowler expressed to me (roughly, I didn't save the email, so I can't quote) that a major problem with using attributes is that they can cause coupling issues. For example, adding the NanoContainer attribute will add a dependency to NanoContainer within your project. Compared this to the NUnit implementation, NanoContainer is much more intrusive. The NUnit attributes are used on the test classes (and test methods). This requires no change to your existing classes and adds no dependency on NUnit within your existing classes.

Attributes are often used as class markers, which can also be done by implementing an interface. However, if you need to mark a method or property an attribute is a great candidate. I think this is another reason that NUnit was so successful concerning attributes. Conceptually, without attributes a class could implement a ITest, but which methods would be run as test methods?

So, when would you use attributes in your code? Currently, I'm working on a project where we have an object that represents several database tables. Additionally, these tables contain data that needs to be transformed. The transformation rules are contained in a database that the business analysts maintain. The business analysts are intimately familiar with the database tables and columns. Therefore, the transformation rules are written using the database table and column names as identifiers.

Unfortunately, the table.column identifier is not very descriptive. For readability we chose to create readable properties on the object and simply add a attribute that contains the table.column identifier. The transformation engine can load the rules from the database, use reflection to find the corresponding property, and transform the value.

public class Foo
{
[Identifier("AMfD.b12F")]
public string Bar
{
get { return bar; }
}
}

With this implementation, the value of the property can be easily accessed using reflection and the identifier or simply by accessing foo.Bar. Conceptually, this could be done with some mapping code also, but this seemed to be the simplest thing that could possibly work.

* Personally, I like the attribute usage in NanoContainer also.

Monday, September 12, 2005

Rake Hurdles

Before Rake is ready for prime time it is going to need some additional capabilities. Currently, the highest priority for me is CruiseControl.net integration. Creating IIS directories is another issue identified by my colleague Brent Cryder. Adding tasks to Rake will be easy, but I wonder what other common tasks will need to be added to Rake...

Thursday, September 08, 2005

Rails in School

From PragDave's blog:
"... I know of an undergraduate course in Scotland that will include a section using Ruby on Rails."
I wonder if college students can appreciate Ruby & Ruby on Rails. When I was in college there was a communications class that used Smalltalk. With little experience in different languages the joys of Smalltalk were easily lost on the students.

I wonder if it's possible to experience the happiness of Ruby without suffering through a few Java or C# projects.

Tuesday, September 06, 2005

Commit from a build file

Subversion comes standard with a command line client that can be used to commit changes. The usual sequence is add new files & remove deleted files, update from the repository, run the build file, and then commit to the repository. This sequence should be followed on every commit, and should be automated.

I've previously shown how easy it is to add & remove with Ruby. Update and commit can be executed in Ruby by `svn up` and `svn commit*` respectively.

All of these commands could be written into a rake build file as tasks. Each task would have pre-requisite tasks and execution will stop if any pre-requisite task fails. Rake supports this with it's dependency model. Expressing dependency in rake is easy.

task TaskName => [:pre-req1, :pre-req2, ...]

Therefore, the dependencies in our build file would look something like this:

task commit => [:test, :update]
task test => [:compile]
task update => [:add, :remove]


Compile, add & remove don't have any dependencies in our example, and are not shown.

The dependency model ensures a commit will not be executed unless all the pre-requisite tasks had been executed. Developers would be abstracted from this and could commit their changes by simply executing "rake commit" from the command line.

* Be sure to set the EDITOR environment variable. When the EDITOR variable is set any commit (without a message or file specified) will cause an editor window to open for you to enter a commit message.

Rake execution

I found a cool feature of rake recently:
"... no matter where you invoke it, rake always executes in the directory where the Rakefile is found. This keeps your path names consistent without depending on the current directory..." - Jim Weirich
Given the directory structure /trunk/src/project/build the rakefile will likely live in the /trunk directory. Because of the above quoted feature you can run rake in /trunk, /trunk/src, /trunk/src/project, or any child directory of trunk.

Sunday, August 28, 2005

Rake Experiences Continue

I've been working on the NanoContainer rake file recently. The development seemed to move in 3 significant directions.

  1. It was very procedural and used standard tasks exclusively.

  2. I incorporated many directory and file tasks to take advantage of only updating files when their dependant files were updated.

  3. The final (for now) version is back to being rather procedural; however, I use uptodate? often to get the benefits of the file task.

The final version is both shorter and more readable than version 2. This version is the easiest to follow because of it's procedural nature, and the use of uptodate? gives the most efficient builds.
require 'CSProjFile.rb'

def build(*relative_path)
File.join("src","build",relative_path)
end

task :default => [:compile, :test]
task :all => [:clean, :default]

task :clean do
rm_rf(build)
rm_rf("src/NanoContainer.Tests/bin")
rm_rf("src/TestComp/bin")
end

task :precompile do
mkdir_p(build) unless File.exists?(build)
def _lib(relative_path)
File.join("lib",relative_path)
end
def _precomp(files)
files.each {|f| cp(_lib(f), build) unless uptodate?(build(f), _lib(f))}
end
_precomp(%w(NUnit.Framework.dll PicoContainer.dll Castle.DynamicProxy.dll NMock.dll))
end

task :compile => :precompile do
def _compile(project)
projFile = CSProjFile.new(File.new("src/#{project}/#{project}.csproj"))
unless uptodate?("#{build(project)}.dll",projFile.files.collect {|f| "src/#{project}/#{f}" })
cd "src/#{project}"
sh projFile.create_csc("../build")
cd "../.."
end
end
%w(NanoContainer NanoContainer.Tests TestComp TestComp2 NotStartable).each {|project| _compile(project)}
end

task :pretest do
def tcVsOutput(*relative_path)
File.join("src","TestComp","bin","Debug",relative_path)
end
mkdir_p(tcVsOutput) unless File.exists?(tcVsOutput)
tcdll = "TestComp.dll"
cp(build(tcdll), tcVsOutput) unless uptodate?(tcVsOutput(tcdll), build(tcdll))
def nanoVsOutput(*relative_path)
File.join("src","NanoContainer.Tests","bin","Debug",relative_path)
end
mkdir_p(nanoVsOutput) unless File.exists?(nanoVsOutput)
def _pretest(files)
files.each {|f| cp(build(f),nanoVsOutput) unless uptodate?(nanoVsOutput(f), build(f))}
end
_pretest(%w(NMock.dll PicoContainer.dll Castle.DynamicProxy.dll NUnit.Framework.dll NanoContainer.dll NanoContainer.Tests.dll))
end

task :test => [:compile,:pretest] do
cd nanoVsOutput
sh "../../../../lib/nunit-console.exe NanoContainer.Tests.dll"
end

Thursday, August 25, 2005

Controlling Subversion with Ruby and irb

I previously blogged about Controlling Subversion with Ruby. In theory it seemed like a good idea; however, in practice I used Ruby's Interactive Ruby Shell (irb). Irb allows me to mass add or delete quickly without needing a Ruby file. If you have Ruby installed, typing irb at the command line should drop you right into irb. Once in irb, it's easy to work with subversion using Ruby:

Add all files with "?" status:
`svn st`.split(/\n/).each { |line| `svn add #{line.delete("?").lstrip}` if line[0,1] =~ /\?/ }
Delete all files with "!" status:
`svn st`.split(/\n/).each { |line| `svn rm #{line.delete("!").lstrip}` if line[0,1] =~ /\!/ }

Wednesday, August 24, 2005

Ruby C# Project File parser (CSProjFile)

In response to my blogs about using rake with .net and how to add an embedded resource, Jeremy Miller asks:

Isn't there an equivalent to the "solution" task in NAnt for Rake?
I don't see how it would be better if I had to manually specify things
like including resource files in the build script.

As far as I know, there is no built in support for .net in rake. However, a .csproj file is just an XML file and should therefore be easy to parse.

I've never done any XML parsing in Ruby so I contacted Jeremy Stell-Smith for a recommendation. His answer was REXML. REXML must have come standard in my version of Ruby because I didn't need to install anything. After about a minute looking at the tutorial I was set.

Of course, being test-driven, I started out with the tests. I didn't feel like creating a Foo.csproj, so I used the NanoContainer.csproj to create a XML string I would use for testing.
require 'test/unit'
require 'csprojfile'

class CSProjFileTest < Test::Unit::TestCase
def CSProjFileTest.NanoConfig
%q!
<VisualStudioProject>
<CSHARP
ProjectType = "Local"
ProductVersion = "7.10.3077"
SchemaVersion = "2.0"
ProjectGuid = "{10C07279-0C4B-49AC-8DA5-54062116C2ED}"
>
<Build>
<Settings
ApplicationIcon = ""
AssemblyKeyContainerName = ""
AssemblyName = "NanoContainer"
AssemblyOriginatorKeyFile = ""
DefaultClientScript = "JScript"
DefaultHTMLPageLayout = "Grid"
DefaultTargetSchema = "IE50"
DelaySign = "false"
OutputType = "Library"
PreBuildEvent = ""
PostBuildEvent = ""
RootNamespace = "NanoContainer"
RunPostBuildEvent = "OnBuildSuccess"
StartupObject = ""
>
<Config
Name = "Debug"
AllowUnsafeBlocks = "false"
BaseAddress = "285212672"
CheckForOverflowUnderflow = "false"
ConfigurationOverrideFile = ""
DefineConstants = "DEBUG;TRACE"
DocumentationFile = ""
DebugSymbols = "true"
FileAlignment = "4096"
IncrementalBuild = "false"
NoStdLib = "false"
NoWarn = ""
Optimize = "false"
OutputPath = "bin\Debug\"
RegisterForComInterop = "false"
RemoveIntegerChecks = "false"
TreatWarningsAsErrors = "false"
WarningLevel = "4"
/>
<Config
Name = "Release"
AllowUnsafeBlocks = "false"
BaseAddress = "285212672"
CheckForOverflowUnderflow = "false"
ConfigurationOverrideFile = ""
DefineConstants = "TRACE"
DocumentationFile = ""
DebugSymbols = "false"
FileAlignment = "4096"
IncrementalBuild = "false"
NoStdLib = "false"
NoWarn = ""
Optimize = "true"
OutputPath = "bin\Release\"
RegisterForComInterop = "false"
RemoveIntegerChecks = "false"
TreatWarningsAsErrors = "false"
WarningLevel = "4"
/>
</Settings>
<References>
<Reference
Name = "System"
AssemblyName = "System"
HintPath = "..\..\..\..\..\WINDOWS\Microsoft.NET\Framework\v1.1.4322\System.dll"
/>
<Reference
Name = "System.Data"
AssemblyName = "System.Data"
HintPath = "..\..\..\..\..\WINDOWS\Microsoft.NET\Framework\v1.1.4322\System.Data.dll"
/>
<Reference
Name = "System.XML"
AssemblyName = "System.Xml"
HintPath = "..\..\..\..\..\WINDOWS\Microsoft.NET\Framework\v1.1.4322\System.XML.dll"
/>
<Reference
Name = "PicoContainer"
AssemblyName = "PicoContainer"
HintPath = "..\..\lib\PicoContainer.dll"
/>
<Reference
Name = "Microsoft.JScript"
AssemblyName = "Microsoft.JScript"
HintPath = "..\..\..\..\..\WINDOWS\Microsoft.NET\Framework\v1.1.4322\Microsoft.JScript.dll"
/>
<Reference
Name = "VJSharpCodeProvider"
AssemblyName = "VJSharpCodeProvider"
HintPath = "..\..\..\..\..\WINDOWS\Microsoft.NET\Framework\v1.1.4322\VJSharpCodeProvider.DLL"
/>
</References>
</Build>
<Files>
<Include>
<File
RelPath = "AssemblyInfo.cs"
SubType = "Code"
BuildAction = "Compile"
/>
<File
RelPath = "DefaultNanoContainer.cs"
SubType = "Code"
BuildAction = "Compile"
/>
<File
RelPath = "Attributes\AssemblyUtil.cs"
SubType = "Code"
BuildAction = "Compile"
/>
<File
RelPath = "Attributes\AttributeBasedContainerBuilder.cs"
SubType = "Code"
BuildAction = "Compile"
/>
<File
RelPath = "Attributes\ComponentAdapterType.cs"
SubType = "Code"
BuildAction = "Compile"
/>
<File
RelPath = "Attributes\DependencyInjectionType.cs"
SubType = "Code"
BuildAction = "Compile"
/>
<File
RelPath = "Attributes\RegisterWithContainerAttribute.cs"
SubType = "Code"
BuildAction = "Compile"
/>
<File
RelPath = "IntegrationKit\ContainerBuilder.cs"
SubType = "Code"
BuildAction = "Compile"
/>
<File
RelPath = "IntegrationKit\LifeCycleContainerBuilder.cs"
SubType = "Code"
BuildAction = "Compile"
/>
<File
RelPath = "IntegrationKit\PicoCompositionException.cs"
SubType = "Code"
BuildAction = "Compile"
/>
<File
RelPath = "Script\AbstractFrameworkContainerBuilder.cs"
SubType = "Code"
BuildAction = "Compile"
/>
<File
RelPath = "Script\FrameworkCompiler.cs"
SubType = "Code"
BuildAction = "Compile"
/>
<File
RelPath = "Script\ScriptedContainerBuilder.cs"
SubType = "Code"
BuildAction = "Compile"
/>
<File
RelPath = "Script\CSharp\CSharpBuilder.cs"
SubType = "Code"
BuildAction = "Compile"
/>
<File
RelPath = "Script\JS\JSBuilder.cs"
SubType = "Code"
BuildAction = "Compile"
/>
<File
RelPath = "Script\JSharp\JSharpBuilder.cs"
SubType = "Code"
BuildAction = "Compile"
/>
<File
RelPath = "Script\VB\VBBuilder.cs"
SubType = "Code"
BuildAction = "Compile"
/>
<File
RelPath = "Script\Xml\ComposeMethodBuilder.cs"
SubType = "Code"
BuildAction = "Compile"
/>
<File
RelPath = "Script\Xml\Constants.cs"
SubType = "Code"
BuildAction = "Compile"
/>
<File
RelPath = "Script\Xml\ContainerStatementBuilder.cs"
SubType = "Code"
BuildAction = "Compile"
/>
<File
RelPath = "Script\Xml\XmlContainerBuilder.cs"
SubType = "Code"
BuildAction = "Compile"
/>
<File
RelPath = "TestScripts\test.js"
BuildAction = "EmbeddedResource"
/>
<File
RelPath = "TestScripts\test.vb"
BuildAction = "EmbeddedResource"
/>
</Include>
</Files>
</CSHARP>
</VisualStudioProject>!
end

def testOutputType
projFile = CSProjFile.new(CSProjFileTest.NanoConfig)
assert_equal(projFile.output_type, "library")
end

def testAssemblyName
projFile = CSProjFile.new(CSProjFileTest.NanoConfig)
assert_equal(projFile.assembly_name, "NanoContainer")
end

def testFiles
projFile = CSProjFile.new(CSProjFileTest.NanoConfig)
expectedFiles = %w(AssemblyInfo.cs DefaultNanoContainer.cs Attributes\\AssemblyUtil.cs Attributes\\AttributeBasedContainerBuilder.cs Attributes\\ComponentAdapterType.cs Attributes\\DependencyInjectionType.cs Attributes\\RegisterWithContainerAttribute.cs IntegrationKit\\ContainerBuilder.cs IntegrationKit\\LifeCycleContainerBuilder.cs IntegrationKit\\PicoCompositionException.cs Script\\AbstractFrameworkContainerBuilder.cs Script\\FrameworkCompiler.cs Script\\ScriptedContainerBuilder.cs Script\\CSharp\\CSharpBuilder.cs Script\\JS\\JSBuilder.cs Script\\JSharp\\JSharpBuilder.cs Script\\VB\\VBBuilder.cs Script\\Xml\\ComposeMethodBuilder.cs Script\\Xml\\Constants.cs Script\\Xml\\ContainerStatementBuilder.cs Script\\Xml\\XmlContainerBuilder.cs)
assert_equal(projFile.files, expectedFiles)
end

def testReferences
projFile = CSProjFile.new(CSProjFileTest.NanoConfig)
expectedRefs = %w(System System.Data System.XML PicoContainer Microsoft.JScript VJSharpCodeProvider)
assert_equal(projFile.references, expectedRefs)
end

def testCscOutput
projFile = CSProjFile.new(CSProjFileTest.NanoConfig)
expectedCsc = "csc /out:../build/NanoContainer.dll /target:library /lib:../build /r:'System.dll;System.Data.dll;System.XML.dll;PicoContainer.dll;Microsoft.JScript.dll;VJSharpCodeProvider.dll' /res:'TestScripts\\test.js,NanoContainer.TestScripts.test.js' /res:'TestScripts\\test.vb,NanoContainer.TestScripts.test.vb' AssemblyInfo.cs DefaultNanoContainer.cs /recurse:AssemblyUtil.cs /recurse:AttributeBasedContainerBuilder.cs /recurse:ComponentAdapterType.cs /recurse:DependencyInjectionType.cs /recurse:RegisterWithContainerAttribute.cs /recurse:ContainerBuilder.cs /recurse:LifeCycleContainerBuilder.cs /recurse:PicoCompositionException.cs /recurse:AbstractFrameworkContainerBuilder.cs /recurse:FrameworkCompiler.cs /recurse:ScriptedContainerBuilder.cs /recurse:CSharpBuilder.cs /recurse:JSBuilder.cs /recurse:JSharpBuilder.cs /recurse:VBBuilder.cs /recurse:ComposeMethodBuilder.cs /recurse:Constants.cs /recurse:ContainerStatementBuilder.cs /recurse:XmlContainerBuilder.cs"
assert_equal(projFile.create_csc("../build"), expectedCsc)
end

def testEmbeddedResource
projFile = CSProjFile.new(CSProjFileTest.NanoConfig)
expectedResources = %w(TestScripts\test.js TestScripts\test.vb)
assert_equal(projFile.embedded_resources, expectedResources)
end

def testConvertToResource
projFile = CSProjFile.new(CSProjFileTest.NanoConfig)
assert_equal(projFile.convert_to_resource("a\\b.c"),"/res:'a\\b.c,NanoContainer.a.b.c'")
end
end
After getting those tests to pass I felt like my CSProjFile class was well enough tested.
require 'rexml/document'

class CSProjFile
def initialize(projFile)
@projXml = REXML::Document.new projFile
@extensions = {"library"=>"dll"}
end

def output_type
@projXml.elements["VisualStudioProject/CSHARP/Build/Settings"].attributes["OutputType"].downcase
end

def assembly_name
@projXml.elements["VisualStudioProject/CSHARP/Build/Settings"].attributes["AssemblyName"]
end

def files
result = []
path = "VisualStudioProject/CSHARP/Files/Include/File"
@projXml.elements.each(path) { |element| result << element.attributes["RelPath"] if compiledFile?(element) }
result
end

def compiledFile?(element)
element.attributes["BuildAction"]=="Compile"
end

def embedded_resources
result = []
path = "VisualStudioProject/CSHARP/Files/Include/File"
@projXml.elements.each(path) { |element| result << element.attributes["RelPath"] if embeddedResourceFile?(element) }
result
end

def embeddedResourceFile?(element)
element.attributes["BuildAction"]=="EmbeddedResource"
end

def references
result = []
@projXml.elements.each("VisualStudioProject/CSHARP/Build/References/Reference") { |element| result << element.attributes["Name"] }
result
end

def create_csc(outDir)
result = []
result << "csc"
result << "/out:#{outDir}/#{assembly_name}.#{@extensions[output_type]}"
result << "/target:#{output_type}"
result << "/lib:#{outDir}"
refs = references.collect {|ref| ref + ".dll"}
result << "/r:'#{refs.join(";")}'"
embeddedFiles = embedded_resources.collect { |item| convert_to_resource(item)}
result << embeddedFiles.join(" ")
recurseFiles = files.each { |item| item.sub!(/.+\\/,"/recurse:") }
result << recurseFiles.join(" ")
result.join(" ")
end

def convert_to_resource(item)
file = item.to_s
id = "#{assembly_name}.#{item.to_s.sub(/\\/,".")}"
"/res:'#{file},#{id}'"
end
end
So, the final (successful) test was changing my NanoContainer rakefile to use the CSProjFile class.
require 'CSProjFile.rb'

buildDir = "src/build"
nanoDll = "build/NanoContainer.dll"
nanoTestsDll = "build/NanoContainer.Tests.dll"
testCompDll = "build/TestComp.dll"
testComp2Dll = "build/TestComp2.dll"
notStartableDll = "build/NotStartable.dll"
nanoTestVsBinDir = "src/NanoContainer.Tests/bin"
nanoTestVsBinDebugDir = "src/NanoContainer.Tests/bin/Debug"
testCompBinDir = "src/TestComp/bin"
testCompBinDebugDir = "src/TestComp/bin/Debug"

task :default => [:compileInit, :compile, :test]
task :all => [:clear, :removeBuildDir, :removeVsDirs, :default]

task :clear do sh "clear" end

task :removeBuildDir => :clear do rm_rf(buildDir) end
task :removeVsDirs => :clear do
rm_rf(nanoTestVsBinDir)
rm_rf(testCompBinDir)
end

directory buildDir

task :compileInit => [buildDir] do
copyToDir(%w(lib/NUnit.Framework.dll lib/PicoContainer.dll lib/Castle.DynamicProxy.dll),buildDir)
copyToDir(%w(lib/NMock.dll lib/NUnit.Framework.dll),buildDir)
end

file nanoDll => :compileInit do compileProj("src/NanoContainer","NanoContainer.csproj") end
file nanoTestsDll => [:compileInit, nanoDll] do compileProj("src/NanoContainer.Tests","NanoContainer.Tests.csproj") end
file testCompDll => :compileInit do compileProj("src/TestComp","TestComp.csproj") end
file testComp2Dll => [:compileInit, testCompDll] do compileProj("src/TestComp2","TestComp2.csproj") end
file notStartableDll => [:compileInit, testCompDll] do compileProj("src/NotStartable","NotStartable.csproj") end
task :compile => [nanoDll,nanoTestsDll,testCompDll,testComp2Dll,notStartableDll]

directory testCompBinDir
directory testCompBinDebugDir
directory nanoTestVsBinDir
directory nanoTestVsBinDebugDir

task :testInit => [testCompBinDir,testCompBinDebugDir,nanoTestVsBinDir,nanoTestVsBinDebugDir] do
cp "src/Build/TestComp.dll", testCompBinDebugDir
copyToDir(%w(src/Build/NMock.dll src/Build/PicoContainer.dll src/Build/Castle.DynamicProxy.dll),nanoTestVsBinDebugDir)
copyToDir(%w(src/Build/NUnit.Framework.dll src/Build/NanoContainer.dll src/Build/NanoContainer.Tests.dll),nanoTestVsBinDebugDir)
end

task :test => [:compile,:testInit] do
cd nanoTestVsBinDebugDir
sh "../../../../lib/nunit-console.exe NanoContainer.Tests.dll"
end

def copyToDir(fileArray, outputDir)
fileArray.each { |file| cp file, outputDir }
end

def compileProj(workingDir, projFileName)
cd workingDir
projFile = CSProjFile.new(File.new(projFileName))
sh projFile.create_csc("../build")
cd "../.."
end


There's much room for improvement, but it work well for a first attempt. Feedback welcome.

Tuesday, August 23, 2005

Add Events to NMock

While using View Observer on my last project we needed a way to raise events for unit testing. The best solution turned out to be stubs; however, while we were evaluating options Levi Khatskevitch created a DynamicMockWithEvents class.

DynamicMockWithEvents inherits from NMock's DynamicMock, but it also contains support for raising events from a mock. To raise an event from a mock simply call the RaiseEvent method with the event name and any optional args.
public class DynamicMockWithEvents : DynamicMock
{
private const string ADD_PREFIX = "add_";
private const string REMOVE_PREFIX = "remove_";

private readonly EventHandlerList handlers;
private readonly Type mockedType;

public DynamicMockWithEvents(Type type) : base(type)
{
handlers = new EventHandlerList();
mockedType = type;
}

public override object Invoke(string methodName, params object[] args)
{
if (methodName.StartsWith(ADD_PREFIX))
{
handlers.AddHandler(GetKey(methodName, ADD_PREFIX), (Delegate) args[0]);
return null;
}
if (methodName.StartsWith(REMOVE_PREFIX))
{
handlers.RemoveHandler(GetKey(methodName, REMOVE_PREFIX), (Delegate) args[0]);
return null;
}
return base.Invoke(methodName, args);
}

private static string GetKey(string methodName, string prefix)
{
return string.Intern(methodName.Substring(prefix.Length));
}

public void RaiseEvent(string eventName, params object[] args)
{
Delegate handler = handlers[eventName];
if (handler == null)
{
if (mockedType.GetEvent(eventName) == null)
{
throw new MissingMemberException("Event " + eventName + " is not defined");
}
else if (Strict)
{
throw new ApplicationException("Event " + eventName + " is not handled");
}
}
handler.DynamicInvoke(args);
}
}

Monday, August 22, 2005

Adding an Embedded Resource to a csc command line compiled assembly

While using Rake to compile and execute NanoContainer.Tests, 4 of my tests kept failing. They were relying on 4 embedded resources that I was not embedding. In Visual Studio it's easy to embed a resource. DevHood and CodeProject both give good information on embedding using Visual Studio.net; however, I wanted to embed a resource using the command line.

MSDN2 provided some good info specific to the command line, but everything I found seemed to detail how to add a .resources or .resx file to an assembly. I needed to add .cs, .js, .java, and .vb files to the assembly. Using csc -? and resgen -? didn't seem to lead me in the right direction either.

Finally I gave up on finding the documentation I needed and starting shooting in the dark. I used /res, /win32res, and /linkresource. The tests kept failing. /res seemed like the answer, but the documentation focuses on .resources files so there was no way to be sure. Enter James Johnson's demo executable. I'd done everything I could think of and the tests were still failing. It was time to fire up an app that could show me what resources were contained in my assembly.

It turned out that my assembly was embedding the resource correctly when I used /res; however, an identifier needed to be given to match the identifier specified in the NanoContainer tests. Once I added the identifier all the tests passed.

Final correct csc (broken to multiple lines for readablity):
csc /out:../build/NanoContainer.Tests.dll /res:'TestScripts/test.cs,NanoContainer.Tests.TestScripts.test.cs' /res:'TestScripts/test.js,NanoContainer.Tests.TestScripts.test.js' /res:'TestScripts/test.java,NanoContainer.Tests.TestScripts.test.java' /res:'TestScripts/test.vb,NanoContainer.Tests.TestScripts.test.vb' /target:library /recurse:*.cs /lib:'../build' /r:'PicoContainer.dll;Microsoft.JScript.dll;VJSharpCodeProvider.dll;Castle.DynamicProxy.dll;NanoContainer.dll;NMock.dll;NUnit.Framework.dll'

Sunday, August 21, 2005

Using Rake for building and testing .net applications

The excitement concerning Ruby seems to grow on a daily basis. The Ruby on Rails framework, RubyGems, and Rake add to this excitement. Martin recently wrote a great article about Using the Rake Build Language.

Mike Ward asked me to help out with NanoContainer.net by creating a build file. This seemed like a perfect time to make use of Rake.

To get started I thought a Hello World Rake build would be appropriate.
task :helloWorld do
sh "echo HelloWorld"
end

Next I work on using Rake & csc to compile NanoContainer.net.
file "build/NanoContainer.dll" => :init do
cd "src/NanoContainer"
sh "csc /out:../build/NanoContainer.dll /target:library /recurse:*.cs /lib:../build /r:'PicoContainer.dll;Microsoft.JScript.dll;VJSharpCodeProvider.dll'"
cd "../.."
end

task :init do
buildDir = "src/build"
mkdir buildDir unless File.exists?(buildDir)

cp "lib/PicoContainer.dll", buildDir
cp "lib/Castle.DynamicProxy.dll", buildDir
cp "lib/NMock.dll", buildDir
cp "lib/NUnit.Framework.dll", buildDir
end

The "build/NanoContainer.dll" file task depends on the init task. This is expressed by:
file "build/NanoContainer.dll" => :init
The init task is used to create the build directory if it's not already been created and copy the dlls that are referenced by NanoContainer and NanoContainer.Tests. The actual sh "csc .." is fairly straight forward; however, if you need more details on csc the "csc -?" command is quite helpful.

The "build/NanoContainer.Tests.dll" file task is very similar:
file "build/NanoContainer.Tests.dll" => [:init, "build/NanoContainer.dll"] do
cd "src/NanoContainer.Tests"
sh "csc /out:../build/NanoContainer.Tests.dll /res:'TestScripts/test.cs,NanoContainer.Tests.TestScripts.test.cs' /res:'TestScripts/test.js,NanoContainer.Tests.TestScripts.test.js' /res:'TestScripts/test.java,NanoContainer.Tests.TestScripts.test.java' /res:'TestScripts/test.vb,NanoContainer.Tests.TestScripts.test.vb' /target:library /recurse:*.cs /lib:'../build' /r:'PicoContainer.dll;Microsoft.JScript.dll;VJSharpCodeProvider.dll;Castle.DynamicProxy.dll;NanoContainer.dll;NMock.dll;NUnit.Framework.dll'"
cd "../.."
end

After building NanoContainer and NanoContainer.Tests I'm ready to create a test task. NUnit provides good documentation for using the NUnit Console application; however, in my test task using the NUnit is very straight forward and easy.
task :test => :compile do
testCompVsBinDebugDir = "src/TestComp/bin/Debug"
mkdir testCompVsBinDebugDir unless File.exists?(testCompVsBinDebugDir)
cp "src/Build/TestComp.dll", testCompVsBinDebugDir

nanoTestVsBinDir = "src/NanoContainer.Tests/bin"
mkdir nanoTestVsBinDir unless File.exists?(nanoTestVsBinDir)

nanoTestVsBinDebugDir = "src/NanoContainer.Tests/bin/Debug"
mkdir nanoTestVsBinDebugDir unless File.exists?(nanoTestVsBinDebugDir)
cp "src/Build/PicoContainer.dll", nanoTestVsBinDebugDir
cp "src/Build/Castle.DynamicProxy.dll", nanoTestVsBinDebugDir
cp "src/Build/NMock.dll", nanoTestVsBinDebugDir
cp "src/Build/NUnit.Framework.dll", nanoTestVsBinDebugDir
cp "src/Build/NanoContainer.dll", nanoTestVsBinDebugDir
cp "src/Build/NanoContainer.Tests.dll", nanoTestVsBinDebugDir

cd nanoTestVsBinDebugDir
sh "../../../../lib/nunit-console.exe NanoContainer.Tests.dll"
end

The majority of the test task is about moving dlls into the NanoContainer.Tests/bin/Debug folder. This is needed because NanoContainer.Tests contains a few tests that use relative paths for testing. Eventually the tests should be refactored to remove this dependency, but I wasn't interested in taking care of this right now. Using Rake it's quite easy to move things around and that was the simplest solution.

I haven't used Rake to it's fullest. Even while I write this I can see things that I need to refactor. Unfortunately, when creating this rakefile I couldn't find much out there to help me. As more examples emerge I fully expect to see a much larger Rake adoption.

Here's my full rakefile for building NanoContainer.net
buildDir = "src/build"
nanoDll = "build/NanoContainer.dll"
nanoTestsDll = "build/NanoContainer.Tests.dll"
testCompDll = "build/TestComp.dll"
testComp2Dll = "build/TestComp2.dll"
notStartableDll = "build/NotStartable.dll"
nanoTestVsBinDir = "src/NanoContainer.Tests/bin"
nanoTestVsBinDebugDir = "src/NanoContainer.Tests/bin/Debug"
testCompBinDir = "src/TestComp/bin"
testCompBinDebugDir = "src/TestComp/bin/Debug"

task :default => [:compileInit, :compile, :test]
task :all => [:clear, :removeBuildDir, :removeVsDirs, :default]

task :clear do sh "clear" end

task :removeBuildDir => :clear do rm_rf(buildDir) end
task :removeVsDirs => :clear do
rm_rf(nanoTestVsBinDir)
rm_rf(testCompBinDir)
end

directory buildDir

task :compileInit => [buildDir] do
copyToDir(%w(lib/NUnit.Framework.dll lib/PicoContainer.dll lib/Castle.DynamicProxy.dll),buildDir)
copyToDir(%w(lib/NMock.dll lib/NUnit.Framework.dll),buildDir)
end

file nanoDll => :compileInit do
cd "src/NanoContainer"
sh "csc /out:../build/NanoContainer.dll /target:library /recurse:*.cs /lib:../build /r:'PicoContainer.dll;Microsoft.JScript.dll;VJSharpCodeProvider.dll'"
cd "../.."
end

file nanoTestsDll => [:compileInit, nanoDll] do
cd "src/NanoContainer.Tests"
sh "csc /out:../build/NanoContainer.Tests.dll /res:'TestScripts/test.cs,NanoContainer.Tests.TestScripts.test.cs' /res:'TestScripts/test.js,NanoContainer.Tests.TestScripts.test.js' /res:'TestScripts/test.java,NanoContainer.Tests.TestScripts.test.java' /res:'TestScripts/test.vb,NanoContainer.Tests.TestScripts.test.vb' /target:library /recurse:*.cs /lib:'../build' /r:'PicoContainer.dll;Microsoft.JScript.dll;VJSharpCodeProvider.dll;Castle.DynamicProxy.dll;NanoContainer.dll;NMock.dll;NUnit.Framework.dll'"
cd "../.."
end

file testCompDll => :compileInit do
cd "src/TestComp"
sh "csc /out:../build/TestComp.dll /target:library /recurse:*.cs"
cd "../.."
end

file testComp2Dll => [:compileInit, testCompDll] do
cd "src/TestComp2"
sh "csc /out:../build/TestComp2.dll /target:library /recurse:*.cs /lib:'../build' /r:'PicoContainer.dll;TestComp.dll'"
cd "../.."
end

file notStartableDll => [:compileInit, testCompDll] do
cd "src/NotStartable"
sh "csc /out:../build/NotStartable.dll /target:library /recurse:*.cs /lib:'../build' /r:TestComp.dll"
cd "../.."
end

task :compile => [nanoDll,nanoTestsDll,testCompDll,testComp2Dll,notStartableDll]

directory testCompBinDir
directory testCompBinDebugDir
directory nanoTestVsBinDir
directory nanoTestVsBinDebugDir

task :testInit => [testCompBinDir,testCompBinDebugDir,nanoTestVsBinDir,nanoTestVsBinDebugDir] do
cp "src/Build/TestComp.dll", testCompBinDebugDir
copyToDir(%w(src/Build/NMock.dll src/Build/PicoContainer.dll src/Build/Castle.DynamicProxy.dll),nanoTestVsBinDebugDir)
copyToDir(%w(src/Build/NUnit.Framework.dll src/Build/NanoContainer.dll src/Build/NanoContainer.Tests.dll),nanoTestVsBinDebugDir)
end

task :test => [:compile,:testInit] do
cd nanoTestVsBinDebugDir
sh "../../../../lib/nunit-console.exe NanoContainer.Tests.dll"
end

def copyToDir(fileArray, outputDir)
fileArray.each { |file| cp file, outputDir }
end

Tuesday, August 16, 2005

Testing View Observer Using Stubs

I recently blogged about the View Observer pattern we used at my last client. The largest obstacle in using View Observer is the claim that Testing Events is not easy. While at the client we tested View Observer 3 different ways to determine which was best. All 3 ways were good for specific reasons; however, testing View Observer seemed easiest using stubs.

The first step is creating the stub class whose state you can use for testing. Often you will want getters and setters for each property and Raise methods for each event defined in the View Interface. This can be automated with code generation.
public class StubAlbumView : IAlbumView
{
private string[] albumListBoxItems;
private string titleTextBoxText;
private string artistTextBoxText;
private string composerTextBoxText;
private bool composerTextBoxEnabled;
private bool classicalCheckBoxChecked;
private int albumListBoxSelectedIndex;

public string TitleTextBoxText
{
get { return titleTextBoxText; }
set { titleTextBoxText = value; }
}

public string[] AlbumListBoxItems
{
get { return albumListBoxItems; }
set { albumListBoxItems = value; }
}

public string ArtistTextBoxText
{
get { return artistTextBoxText; }
set { artistTextBoxText = value; }
}

public string ComposerTextBoxText
{
get { return composerTextBoxText; }
set { composerTextBoxText = value; }
}

public bool ComposerTextBoxEnabled
{
get { return composerTextBoxEnabled; }
set { composerTextBoxEnabled = value; }
}

public bool ClassicalCheckBoxChecked
{
get { return classicalCheckBoxChecked; }
set { classicalCheckBoxChecked = value; }
}

public int AlbumListBoxSelectedIndex
{
get { return albumListBoxSelectedIndex; }
set { albumListBoxSelectedIndex = value; }
}

public event UserAction ApplyButtonClick;
public event UserAction CancelButtonClick;
public event UserAction ClassicalCheckBoxCheck;
public event TextChangedUserAction ArtistTextChanged;
public event TextChangedUserAction TitleTextChanged;
public event TextChangedUserAction ComposerTextChanged;
public event IndexChangedUserAction AlbumListBoxSelectedIndexChanged;

public void RaiseApplyButtonClick()
{
ApplyButtonClick();
}

public void RaiseCancelButtonClick()
{
CancelButtonClick();
}

public void RaiseArtistTextChanged(string arg)
{
ArtistTextChanged(arg);
}

public void RaiseTitleTextChanged(string arg)
{
TitleTextChanged(arg);
}

public void RaiseComposerTextChanged(string arg)
{
ComposerTextChanged(arg);
}

public void RaiseAlbumListBoxSelectedIndexChanged(int arg)
{
AlbumListBoxSelectedIndexChanged(arg);
}

public void RaiseClassicalCheckBoxCheck()
{
ClassicalCheckBoxCheck();
}
}

The interesting thing about the observer tests is that they assert the state of the view. Therefore, the observer is unit tested based on the values of the view changing, not how it changes those values. The end result is a Observer behavioral test using the View's state that isn't tied to the implementation of the Observer.

The tests validate the state of the View after Observer creation and after each event raised from the View.

[TestFixture]
public class AlbumObserverTest
{
[Test]
public void ObserverConstructorSetsViewsValues()
{
StubAlbumView view = new StubAlbumView();
new AlbumObserver(view, createAlbums());
Assert.AreEqual(view.AlbumListBoxItems,new string[] {"Title1","Title2","Title3"});
Assert.AreEqual(view.TitleTextBoxText, "Title1");
Assert.AreEqual(view.ArtistTextBoxText, "Artist1");
Assert.AreEqual(view.ComposerTextBoxText, "Composer1");
Assert.AreEqual(view.ComposerTextBoxEnabled, true);
Assert.AreEqual(view.ClassicalCheckBoxChecked, true);
Assert.AreEqual(view.AlbumListBoxSelectedIndex, 0);
}

[Test]
public void SelectedIndexChangeUpdatesView()
{
StubAlbumView view = new StubAlbumView();
new AlbumObserver(view, createAlbums());
view.RaiseAlbumListBoxSelectedIndexChanged(1);
Assert.AreEqual(view.TitleTextBoxText, "Title2");
Assert.AreEqual(view.ArtistTextBoxText, "Artist2");
Assert.AreEqual(view.ComposerTextBoxText, "");
Assert.AreEqual(view.ComposerTextBoxEnabled, false);
Assert.AreEqual(view.ClassicalCheckBoxChecked, false);
Assert.AreEqual(view.AlbumListBoxSelectedIndex, 1);
}

[Test]
public void ClassicalCheckBoxCheckUpdatesView()
{
StubAlbumView view = new StubAlbumView();
new AlbumObserver(view, createAlbums());
view.RaiseClassicalCheckBoxCheck();
Assert.AreEqual(view.ComposerTextBoxText, "");
Assert.AreEqual(view.ComposerTextBoxEnabled, false);
Assert.AreEqual(view.ClassicalCheckBoxChecked, false);
}

[Test]
public void TitleTextChangedUpdatesView()
{
StubAlbumView view = new StubAlbumView();
new AlbumObserver(view, createAlbums());
view.RaiseTitleTextChanged("new title");
Assert.AreEqual(view.TitleTextBoxText, "new title");
}

[Test]
public void ArtistTextChangedUpdatesView()
{
StubAlbumView view = new StubAlbumView();
new AlbumObserver(view, createAlbums());
view.RaiseArtistTextChanged("new artist");
Assert.AreEqual(view.ArtistTextBoxText, "new artist");
}

[Test]
public void ComposerTextChangedUpdatesView()
{
StubAlbumView view = new StubAlbumView();
new AlbumObserver(view, createAlbums());
view.RaiseComposerTextChanged("new composer");
Assert.AreEqual(view.ComposerTextBoxText, "new composer");
}

[Test]
public void CancelUpdatesView()
{
StubAlbumView view = new StubAlbumView();
new AlbumObserver(view, createAlbums());
view.RaiseComposerTextChanged("new composer");
view.RaiseTitleTextChanged("new title");
view.RaiseArtistTextChanged("new artist");
view.RaiseClassicalCheckBoxCheck();
view.RaiseCancelButtonClick();
Assert.AreEqual(view.TitleTextBoxText, "Title1");
Assert.AreEqual(view.ArtistTextBoxText, "Artist1");
Assert.AreEqual(view.ComposerTextBoxText, "Composer1");
Assert.AreEqual(view.ComposerTextBoxEnabled, true);
Assert.AreEqual(view.ClassicalCheckBoxChecked, true);
}

[Test]
public void ApplyUpdatesModel()
{
IAlbum[] albums = createAlbums();
StubAlbumView view = new StubAlbumView();
new AlbumObserver(view, albums);
view.RaiseTitleTextChanged("new title");
view.RaiseArtistTextChanged("new artist");
view.RaiseClassicalCheckBoxCheck();
view.RaiseApplyButtonClick();
Assert.AreEqual(albums[0].Title, "new title");
Assert.AreEqual(albums[0].Artist, "new artist");
Assert.AreEqual(albums[0].Composer, "");
Assert.AreEqual(albums[0].IsClassical, false);
view.RaiseClassicalCheckBoxCheck();
view.RaiseComposerTextChanged("new composer");
view.RaiseApplyButtonClick();
Assert.AreEqual(albums[0].Composer, "new composer");
}


private IAlbum[] createAlbums()
{
return new Album[]
{
new Album("Title1",true,"Artist1","Composer1"),
new Album("Title2",false,"Artist2",""),
new Album("Title3",false,"Artist3","")
};
}
}

Saturday, August 13, 2005

Testing Events in C#

As I previously mentioned in Firing Silver Bullets I like to try things out in excess. Recently, I've been using events for Error Handling between layers, Separation of Presentation Logic, and just about anything that seemed like it might be a fit.

The most common argument you hear against events is that they are hard to test. Never being shy about a challenge I set out to dismiss this myth. My recent event experience has been in both C# 2.0 and 1.1. Depending on which version of C# I'm using the tests differ slightly.

Assume a simple class called PositiveNumber that takes an int in it's constructor and fires an Invalid event when Validate() is called if the constructor arg is not positive.

Example C# 1.1
[Test]
public void PositiveNumberDoesNotFireInvalidIfNumberIsPositive()
{
PositiveNumber num = new PositiveNumber(1);
num.Invalid+=new ValidationHandler(AssertFail);
num.Validate();
}
public void AssertFail()
{
Assert.Fail();
}

That's simple enough for me; however, testing that the event does occur is less straight forward. One option is to declare a class level bool that is set to false in the test and then set to true by the event handler. After the event is fired the bool can be tested for true. I've never been a fan of class variables in tests since they feel like global variables in a procedural application. Therefore, I actually prefer throwing a success exception (yes, I did say that).
[Test, ExpectedException(typeof(ApplicationException),"Success")]
public void PositiveNumberDoesFireInvalidIfNumberIsNotPositive()
{
PositiveNumber num = new PositiveNumber(0);
num.Invalid+=new ValidationHandler(ThrowSuccess);
num.Validate();
}
public void ThrowSuccess()
{
throw new ApplicationException("Success");
}

Perhaps a better exception than ApplicationException could be used, but you get the point. You hate it? You never imagined an exception could indicate success and "Exceptions are only for exceptional situations". Yeah, I get all that, but what's more clear than 4 lines of code that show expected behavior for an event? Read it a few more times and try to think of something more clear. Let me know if you find it.

Example C# 2.0
[Test]
public void PositiveNumberDoesNotFireInvalidIfNumberIsPositive()
{
PositiveNumber num = new PositiveNumber(1);
num.Invalid += delegate { Assert.Fail(); }
num.Validate();
}

Not much different, but Anonymous Methods do make it a bit cleaner. With the addition of Anonymous Methods I abandon the ThrowSuccess method. I could just throw the exception in the Anonymous Method; however, I can now declare the bool in the method and access it from the Anonymous Method. I'm not sure which I prefer more, but my teammates seem to prefer this method.
[Test]
public void PositiveNumberDoesFireInvalidIfNumberIsNotPositive()
{
bool methodCalled = false;
PositiveNumber num = new PositiveNumber(0);
num.Invalid += delegate { methodCalled = true; }
num.Validate();
Assert.IsTrue(methodCalled);
}

Testing the object that raises the events is fairly easy; however, testing the observers of these events can seem tough at first glance. In testing View Observer we used 3 different approaches. I'll detail those in the next few days.